The installation procedure then initializes the PLM database setup process.
A Few Definitions
Database objects
Data structures implemented to support the PLM database. Generating database objects:
- creates (or uses existing) tablespace (Oracle and DB2) and bufferpool (DB2 only)
- creates data structures (application tables, indexes and views) using the DDL files installed with the code; the role of these data structures is to manage data persistency and object mapping
- sets up privileges for accessing the data structures
- in all database domains, sets up (inserts) CDM STEP data required for domain management (mapping of domain objects)
- creates (if necessary), alters and grants the Database table owner and the database connection user in the database.
Startup data
Once the data structures have been created, the installation inserts startup data into certain database application domains. Generating startup data:
- sets up domain administration
- sets up a default people and organization (P&O) implementation comprising a root organization (ADMIN), a default role used for logging on (VPMADMIN), and an administrator
- creates default security management: privileges (functional access control), masks (data entity & attribute access control) and processes.
Settings
Setting files: CATDbServers.CATSettings, CATRdbServers.CATSettings, VPMAdmin.CATSettings, TransactionRepos.CATSettings.
Starting the PLM Database Setup Program
You can interrupt the installation here. Note that, if you do so, you will only have installed the files. You will lose the benefit of being able to set up the PLM database from within the graphic interface of the installation program.
You can complete the PLM database setup operation at a later date using the following command:
./catstart -run PLMDBSetup
The Authentication dialog box is displayed along with the PLM Database Setup dialog box:

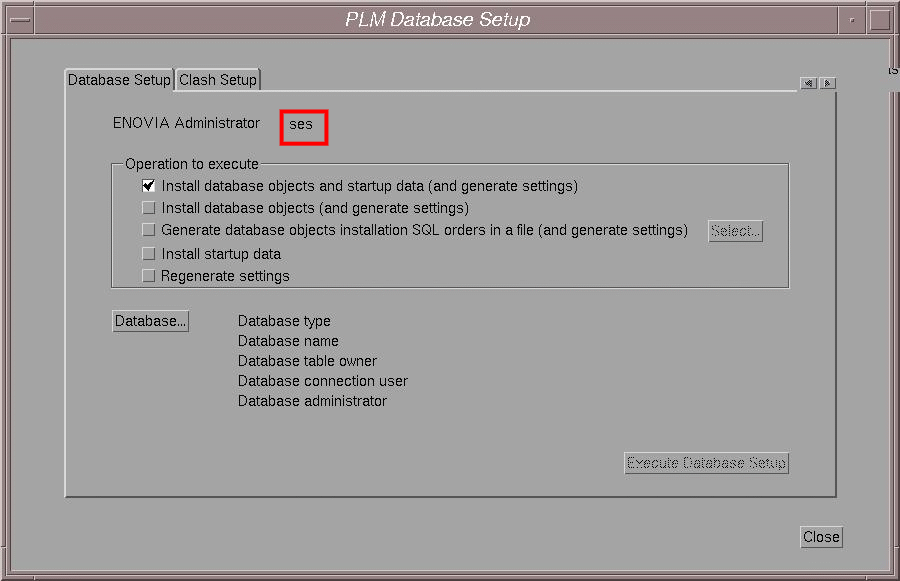
The ENOVIA Administrator:
- has administrative privileges
- creates users
- grants privileges for users
- grants roles to users
- grants process access to users
- must already exist as a system user.

Description of Operations to Execute
The operations to execute using the PLM database setup dialog box are:
Install database objects and startup data (and generate settings)
Generates data objects, startup data and settings. This is the default option.
Install database objects (and generate settings)
Generates only the bufferpool (DB2 only) and/or tablespace to be created (if required), the Database table owner and the database connection user to be created in the database (if necessary), altered and granted, and the DDL files SQL orders to be executed, creating the tables, indexes, views, inserting values and doing grants. The startup data will not be installed: their installation needs the database objects to be installed before.
Generate the database objects installation SQL orders in a file (and generate settings)
If you don’t want to install the database objects during the PLM database setup, but want only to generate a file containing the SQL orders to execute later in order to install the database objects, use this option. Startup data will not be installed.
Install the startup data
Generates the Project startup data (LoadAdmin), the People and Security startup data and the Graphs import startup data. This should only be done when the database objects already exist.
Regenerate settings
If you have already installed the database objects and the startup data, this option regenerates and updates the environment file and the settings (CATDbServers.CATSettings, CATRdbServers.CATSettings, TransactionRepos.CATSettings, VPMAdmin.CATSettings, and VPMAdmin.adm).
Install database objects and startup data (and generate settings)
- Enter the user name and password of the ENOVIA Administrator, then click OK.
The ENOVIA Administrator name is added to the top of the PLM Database Setup dialog box:

The default option when installing the database from scratch is Install database objects and startup data (and generate settings).
- You are going to create the database objects and startup data, so
use the default option and click the Database... button.
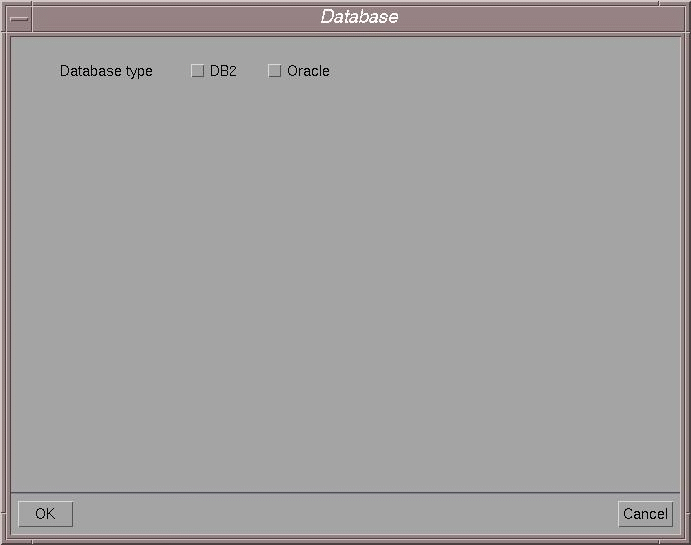
A dialog box prompts you to indicate the database type:

-
Select the check button for the database you are using, then click OK.
For example, check the DB2 option to access the DB2 options.
Options Specific to DB2

DB2 install path
Click the Browse... button to select the DB2 install path. The DB2 install path is different from the DB2 instance path, and not
/u/db2client. For example, it could be typically:/opt/IBM/db2/V9.1The install path must contain:
instance/db2ilistSelecting the install path automatically detects the DB2 instance, Database alias name and Database directory.
DB2 instance
Click on the selection button to select the DB2 instance.
Database alias name
Select the database alias name for the chosen DB2 instance.
Note: All available DB2 instances, remote as well as local, will appear in the selection list.
Database directory
If the database directory of the chosen database alias is LOCAL, the database directory field will contain its path. Note that due to a DB2 problem, if you want to use a local database, you must previously catalog it in remote node.
If the database directory of the chosen database alias is REMOTE, the database directory field will simply specify the text REMOTE.
Database table owner
The Database table owner is known in the database, but is not known in ENOVIA LCA.
Database connection user
This is a system userid used to connect to the database. All connections to the database will be performed under this id (the main interest of this specific user being for remote database connectivity, since server authentication is being used. With a local database, it might identical to be the database administrator. This user creates the data structures in the database.
Password
Enter the database connection password.
Database administrator
Specify the user name for the database administrator.
The database administrator:
- has the privileges to administrate the database
- creates tablespaces (spaces for the data structures that will contain the data).
Password
Enter the database administrator password.
Options Specific to Oracle

Oracle home directory
Click the Browse... button to select the Oracle home directory.
Database service name
Enter the Database service name.
Oracle clients communicate with Oracle servers through service names, which are easy-to-remember aliases for database addresses. Service names can be resolved using various methods:
- Local Naming method: resolves service names using a local configuration file (TNSNAMES.ORA, SQLNET.ORA, LISTENER.ORA).
- Centralized Naming method: resolves service names using Oracle Names (highly recommended to centrally administer large Oracle networks).
To use the Local Naming method check the TNS_ADMIN check box (this is the default).
The path of the default
tnsnames.orafile containing the list of database service names is highlighted, but you can click the browse button and choose the file at a different location.Database table owner
The Database table owner is known in the database, but is not known in ENOVIA V5 VPM.
Password
Enter the Database table owner password.
Database connection user
This is a user database. All connections to the database will be performed under this user (the main interest of this specific user being for remote database connectivity, since server authentication is being used). With a local database, it might be identical to be the database administrator. This user creates the data structures in the database.
Password
Enter the database connection password.
Database administrator
Specify the user name for the database administrator.
The database administrator:
- has the privileges to administrate the database
- creates tablespaces (spaces for the data structures that will contain the data).
Password
Enter the database administrator password.
Note about Oracle Userids
For Oracle, do not choose userids starting with a numeric character, an error may occur. If you do, a warning message will prompt you to correct the problem.
Selecting the Tablespace
DB2
- Click the Tablespace... button.
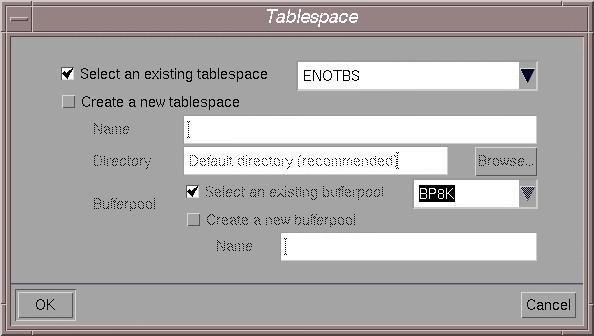
The Tablespace dialog box is displayed:

Note: the ENOTBS tablespace is a physical container used for storing the tables in the database.
Oracle

- Check either the Select an existing tablespace or Create a new tablespace option.
To create a new tablespace, enter its name and the directory where it is to be stored, then select an exiting bufferpool or create a new one and name it.
- Click OK.
On Oracle, if the user name you used for the Database table owner exists already in the database, the following warning message appears:
The user xxx already exists in the database.
Do you want to
		use this user?
If so, click Yes. If it does not exist, the following message:
The user xxx doesn`t exist in the database.
Do you
				want to create this user now?
prompts you to create it. To do so, click Yes.
This returns you to the Database dialog box which now contains the name of the tablespace.
- Click OK again.
This returns you to the PLM Database Setup dialog box containing all the information you entered:
DB2

Oracle

- Click the Execute Database Setup button to set up the PLM database.
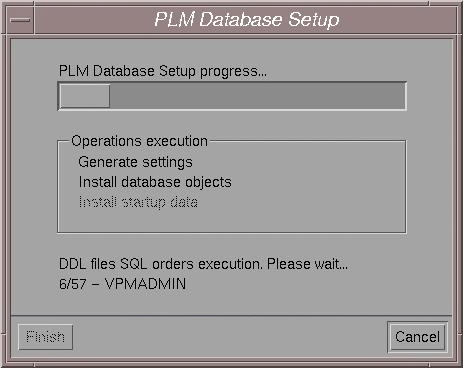
The setup process starts:

If the PLM database setup for a DB2 database hangs during the execution of SQL commands (Install database objects step), and the following message appears in the command window in which it was started:
Warning : detected a low virtual memory condition

       Please close some applications
you must kill the PLMDBSetup process and run the following command with root authority:
ulimit unlimitedNote: The limit must be located between 32MB (minimum) and unlimited value (maximum).
Then, restart the PLMDBSetup process using the catstart command in the same window.
The PLM database setup process comes to an end when you see the message:
PLM Database Setup successful
- Click the Finish button to finish setting up the PLM database.
Log File
The log file is located in the installation directory and is named:
SetupPLMDB.log
Performing PLM Database Setup from the Command Line
If you interrupt the setup and decide to set up the PLM database later:
- Log on as root.
- Go to the following installation directory:
/usr/DassaultSystemes/B20/OS/code/command
- Enter the command:
./catstart -run PLMDBSetup
![]()