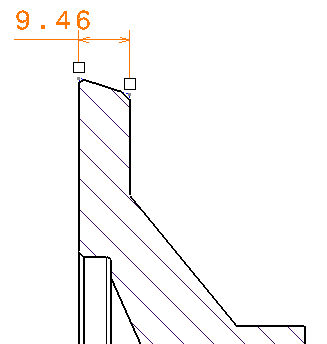
This task will show you how to create dimensions between an intersection point and an element or between two intersection points.
-
Click Dimension
 in the Dimensioning toolbar.
 -
Click Intersection Point Detection
 in the Tools Palette.
 -
Position the mouse over the first intersection point. An intersection point is the meeting point of:
-
2 extensions lines (as shown in this example)
-
2 lines
-
a line and an extension line.
A preview of the intersection point is displayed.


- In the case of drawings with many elements displayed on screen, intersection points may sometimes be difficult to detect. If this happens (i.e. if the intersection point is not previewed or if the previewed intersection point is not the one you want), simply position the mouse over the first and then the second reference element. The proper intersection point will then be previewed.
- In the case of a generative view created with the Approximate generation mode, detection of intersection points is not available. In this case, you need to position the mouse over the first and then the second reference element.
- In the case of 2D Layout for 3D Design, intersection points are only detected between 2D lines belonging to the view content, whether in the active view or not.
-
-
Click to create the intersection point. The point is created, as well as construction lines and coincidence constraints between the point and its reference elements.

- The display and behavior of intersection points is defined by the administrator in the standards. Indeed, the administrator can specify the style that should be applied to the intersection point and construction line, whether the intersection point can be printed or not, and whether construction lines should be displayed and/or printable.
- Creating a dimension between intersection points is a sort of shortcut that combines the creation of an intersection point, construction lines, constraints and a dimension all at once. There is no actual link between the dimension and the geometry on which it is based. As a result, deleting the dimension does not delete this geometry (as is already the case when creating other types of dimensions on existing geometry).
-
Now, position the mouse over the second intersection point.

-
Click to create the intersection point. A preview of the dimension is displayed. By default, this dimension is a distance dimension.


At this point, if you want to create a diameter dimension or a radius dimension rather than a distance dimension, you can right-click to display a contextual menu in which you will be able to change the dimension type from the default Distance to Diameter Edge or Radius Edge. For the purpose of this scenario, leave the default option, Distance, selected.
-
Using the mouse, position the dimension as wanted.
-
Click to validate and end the dimension creation.


Dimension created between intersecting points measures the distance between the 2D points. Thus, in case of generated views, as these 2D points are constrained on the generated geometry they are impacted by generative view operations like breaks for broken views. As a result the dimension may not reflect the true 3D part/product value. For example a distance dimension between two intersection points will show a value smaller than the distance measured on the 3D part, when the view is broken between these points.
![]()