-
Click the Text icon
") in the Annotations toolbar.
in the Annotations toolbar.")
-
Select the element to which you want to associate a text.
As an example, we will use a dimension. In this particular case, you can associate the text to the dimension line by clicking it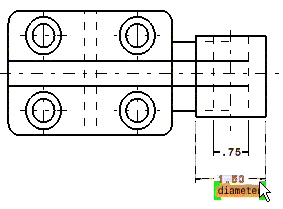
The green text frame is displayed as well as the Text Editor dialog box.
-
Enter the text to be created in the Text Editor dialog box or directly on the drawing. For example, enter "diameter".
Press Shift+Enter to add new line in the Text Editor if needed and press Enter to validate the text.")
-
Click in the free space or click the Select icon
") to end the text creation.
to end the text creation. -
If needed, select the dimension and move it to the desired location.
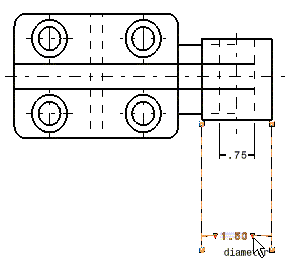
The text remains associated to the dimension.
")
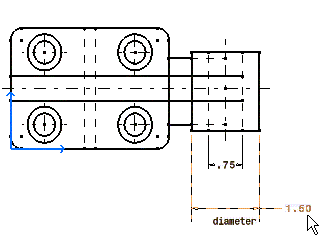
- Make sure you select the element that you want your annotation to be associative to with care. For example, in the case of an annotation associated to a dimension extension line, then moving the dimension value will not necessarily move the annotation.
- When creating associated texts, pressing the SHIFT key lets you change the orientation of the text as regards the element to which it is associated.