-
Click Project Tag
 in the Tag toolbar.
 -
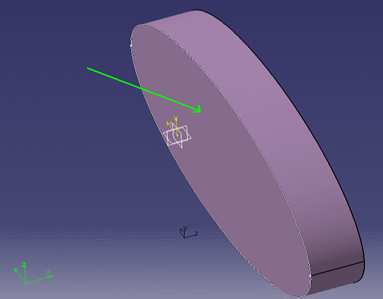
Select the surface of the CATPart Ellipse1 as shown below.
The Project Tag dialog box appears.
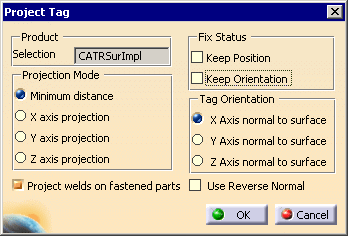
The options available are explained below.
The Project Tag dialog settings are saved throughout the given session, and need not be set every time the command is launched. However, once the session is closed, all the settings are lost.
-
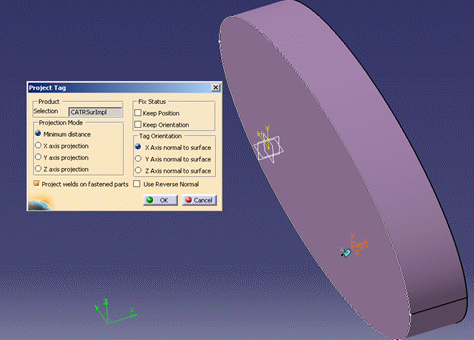
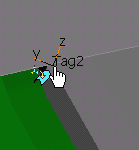
Select the option X Axis normal to the surface under the frame Tag Orientation, and then select the tag tag1.
If any of the radio buttons under the frame Tag Orientation is checked, the tag axis (in this case, X-Axis as shown above), will be along the normal to the surface selected.
In this case, as shown below, the position of the tag will be on the surface selected.
-
Click OK in the Project Tag dialog box.
Note that, the Project welds on fastened parts check box projects the welds on the parts fastened by these welds. -
Create a tag group and some tags.
-
Select the product and the Project Tag
. -
Deselect the Project welds on fastened parts check box.
-
Select the tags for projection.
Note that, the tags that have been selected for projection have a unique icon identifying them. 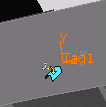
-
You can accept the position of the tag as it appears on the geometry by going to the final step, OR use your left mouse button to select the tag, and without releasing the button, you can slide the tag along the selected surface until you have it positioned as you like.
-
In this case, the tag moves to the closest point (i.e., the minimum distance), and it retains its original orientation. Once you click OK , the project tag icon disappears from the geometry.
|
For: |
If you select: |
The effect is: |
|
Projection Mode |
Minimum distance |
The tag will be projected onto the surface at the shortest possible distance. |
|
X, Y, or Z axis projection |
The tag will be projected onto the surface at the shortest possible distance along the specified axis. |
|
|
Fix Status |
||
|
Keep Position |
If this option is checked, only the orientation is applied to the tag and position of the tag remains unchanged. |
|
|
Keep Orientation |
This option retains the current orientation of the tag, even after the projection. Only the location of the tag changes. Hence, none of the other tag orientation options will be considered, and are therefore disabled. |
|
|
Tag Orientation |
||
|
X, Y, or Z normal to surface |
The tag's orientation to the surface will change, so that, it is normal to the surface along the axis selected. |
|
Project welds on fastened parts |
Enable/Disable |
If you select this check box, you enable projecting the welds on the parts fastened by these welds. When this option is on, the selected product is ignored. |
|
Use Reverse Normal |
Enable/Disable |
If this option is checked, the selected axis will be aligned to the negative normal. |
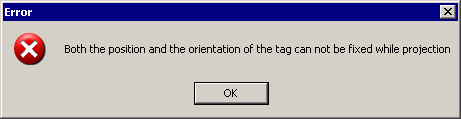
The position and orientation of a tag cannot be locked while projecting it. This effectively means that, the tag is projected at the same place, for which the projection functionality is not needed. Hence, if both the check boxes (Keep Position and Keep Orientation) are checked, an error message will be displayed.
Note: Selection of options for projection will take effect, only for the subsequent selections of the tags to project.