Defining Generic Features
-
Click Define Generic Feature
 .
. -
Select the insertion point in the procedure.
The Generic Features dialog box appears: 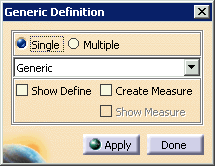

- Selecting a feature twice deselects that feature.
- You can create a measure path as you create a feature, just as you can with a specific feature definition, by checking the Create Measure box.
- If you check Show Define or Show Measure, you can see the Define or Measure dialog box for each feature. (The Show Measure box is enabled only when you select Create Measure.)
- If the first feature is a surface, you can select any feature thereafter.
- The features do not have to be on the same part (e.g., the cylinder formed by a part and its cap can be defined).
- The features do not have to be congruent (see below).
- Although this example shows selecting geometry, you can also use this command to select tolerances instead.
- When you select geometry, you can only select recognized geometry. For instance, a curve in circle shape, or two surfaces looking like a cylindrical element will not be recognized.
- If you are in Single feature mode, you can use the pulldown menu and select Point instead of Generic.
-
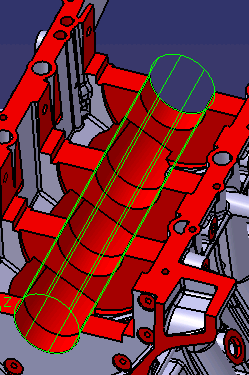
Select a single feature or select multiple similar features on the geometry (e.g., a cylinders).

-
Select the Apply button; the feature appears on the geometry.
-
Select Done to complete the define feature activity creation.
Editing a Feature Pointing to Multiple Geometry
-
Double click on the feature.
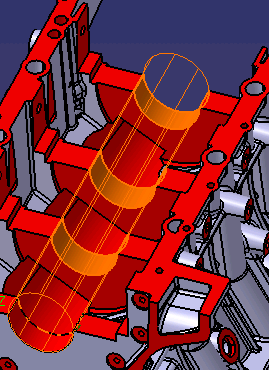
The selected geometrical features that comprise the defined feature are highlighted. -
Deselect a feature.
-
Click on Done, and the defined feature is edited.
