-
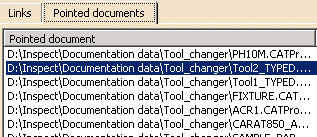
From the menu bar, select Edit>Links and the
Pointed documents tab..
-
Double click on the line listing the file to be fixed
(e.g., Tool_TYPED).
| The tool will appear in a new Resource Builder window. |
-
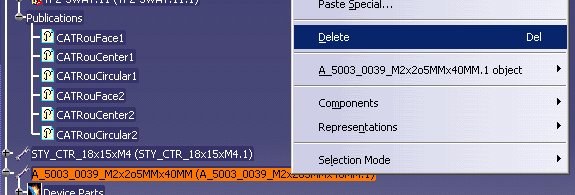
Alter the tool by selecting the tip and, using the
context menu, deleting it.
-
Use the catalog to insert a new stylus and tip in the
tool assembly and use the snap command to put the new parts on the
assembly.
-
Save the file with a new name and exit from resource
builder.
-
In the inspection process product, again select
Edit>Links and the Pointed documents tab.
-
Select the original part (e.g., TOOL_TYPED) and select
the Replace button.
| A File Selection window appears. |
-
Navigate to the new part and click Open.
-
Click OK.
-
Use Insert Resource to import the new tool into the PPR tree.
-
Snap the tool onto the probe head.
-
Click Save Initial State ,
and select All Products and States.
-
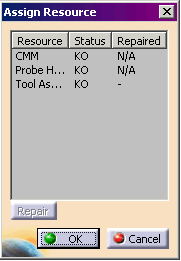
Select the Assign Resource command.
| The Assign Resource dialog box appears. |
  |
-
Select Tool Rack and select the Repair
button.
| The Define Tool Rack dialog box appears. |
 |
-
Assign the new tool to a new station and set it as the
initial tool.
-
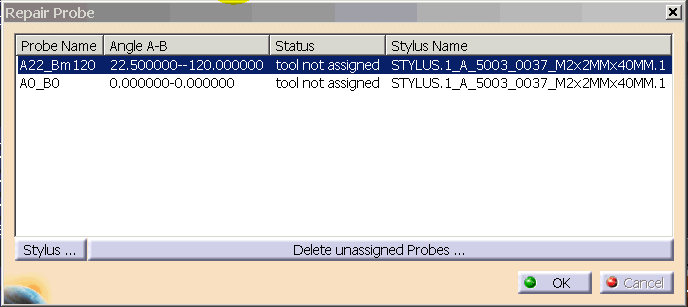
Select the Repair Tool button.
| The Repair Probe dialog box appears. |
 |
-
Select the new tools; they will appear as repaired.
-
Select the OK button.
-
Run a simulation of the inspection process to verify
that there are no collisions.


