This section provides detailed information about the exact
measurement computation.
Measure between command permits exact measure on geometrical entities.
The measure computation is based on the geometrical modeler which
specifies a tolerance value for creating geometrical objects. This
tolerance value must be taken into account when performing exact
measurements as it impacts greatly the measure results
Understanding the Tolerance Value
The tolerance value is the threshold value under which two
geometrical points coincide. In other words, this is
the lowest admissible length under which a geometrical object can be
created.
This tolerance value specifies the minimum length for a valid object. It
is set to 10^-3 unit. As the unit is expressed in mm, lines with length
shorter than 1micro-m are not valid.
For example, curves or edges whose length is below the tolerance value
are not created.
The tolerance value specified by the geometric modeler leads to manage
carefully:
-
coincidence issues (i.e. when the distance value between two geometrical points is below the tolerance value, the two points coincide.
-
impacts on Boolean operators (e.g. edges with a length value below the tolerance value cannot be created).
The figure below show the impact of the tolerance value at creation time:
On the top row, if D > tolerance value, a new face is created.On the bottom row, if D < tolerance value the face is separated into two distinct faces.

Impact of the Tolerance Value on Measure Between Computation in Exact Mode
It is not possible to guarantee the validity of measure results when those are below the tolerance value specified by the geometrical modeler (0.001mm).
Impact of the Tolerance Value on Measure Item Computation in Exact Mode
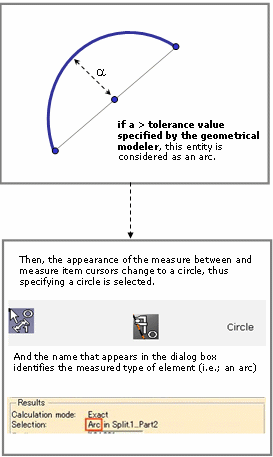
Surfaces, Arcs, curves and lines are created with respect to the tolerance value specified by the geometrical modeler.
The Measure Item capability may detect that the geometry corresponds to an arc when the curvature radius is changing inside the limits of the tolerance value specified by the geometrical modeler.
 |
 |
![]()