GARDENAATOMIZER.model
GARDENABODY12.model
GARDENABODY22.model
GARDENALOCK.model
GARDENANOZZLE12.model
GARDENAREGULATOR.model
GARDENATRIGGER.model
GARDENAVALVE.model
GARDENA_NOZZLE22.model
GARDENA_REGULATION_COMMAND.model
-
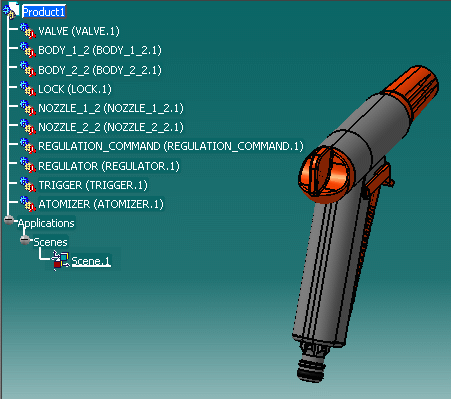
In the specification tree, select the products of the Assembly that will define the Enhanced Scene content.
Selecting Enhanced Scene Content
Note that there are three ways to select Enhanced Scene content:
- No selection: the entire Assembly will appear in the Enhanced Scene
- One or more products selected (a subset of the Assembly): only the components in the branches leading back to the Assembly root of these selected products will appear in the Enhanced Scene
- An existing Scene selected (Enhanced Scene or Old Scene): the new Enhanced Scene will be a copy of the selected one
If only a subset of the Assembly is selected, the Enhanced Scene will contain only the selected products and their components. Regardless of the level of the selected products, the branches leading back to the Assembly root will be displayed in the Enhanced Scene tree and all representations in the branches will appear in the Enhanced Scene.
-
Click the Enhanced Scene icon
 .
.
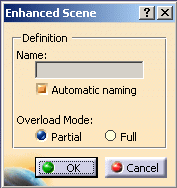
The Scene dialog box appears.
-
To define the name of the Enhanced Scene, clear the Automatic naming check box to deselect it and enter the name in the Name text-entry field.
Note: Automatic naming enables you to automatically attribute names to Enhanced Scenes of the form Scene.1, Scene.2, Scene.3, etc. (The automatic naming mechanism is National-Language Supported.) -
To define the Overload Mode, click the Partial radio button or click the Full radio button.
Overload Mode Partial: The scene will only overload attributes for a few products and modifications to the main assembly of those attributes not overloaded in the scene will impact the scene. Overload Mode Partial favors performance as long as you don't overload too many attributes. An Enhanced Scene created with Overload Mode Partial will be indicated in the specification tree by the symbol .
.
Overload Mode Full: All attributes supported for overloading of each element of the assembly (under the products selected at scene creation) will be overloaded by the scene. Products overloaded by the scene will henceforth not be impacted by modifications to the main assembly regarding attributes supported for overloading. Overload Mode Full favors Enhanced Scene independence from the Assembly. An Enhanced Scene created with Overload Mode Full will be indicated in the specification tree by the symbol .
.
For more information, see Overload Modes in Enhanced Scenes.
Once the scene is created, it is not possible to change the overload mode; nevertheless, it is possible to create a new Enhanced Scene from an existing Enhanced Scene and to affect a different overload mode to the new Enhanced Scene at its creation.
-
Click OK to validate.
The Enhanced Scene is created.
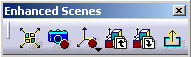
The Enhanced Scene appears. A background (the color of which you define in the Tools > Options > DMU > DMU Navigator settings) indicates that you are now in Enhanced Scene context. The DMU Scenes toolbar appears.
Applicative Data in Enhanced Scene Context
Enhanced Scene Contextual Menu
|
Contextual Menu Entry |
Action |
| Definition | activates the Enhanced Scene |
| Check Position | highlights all components for which the position attribute is different from the corresponding Assembly position attribute (see Checking Component Position) |
| Save Viewpoint | overloads the viewpoint attribute with the current viewpoint (see Saving a Viewpoint in New Scene Context) |
| Exit Scene | exits the Enhanced Scene and return to Assembly context |
| Apply Scene on Assembly | applies the overloaded attributes of the Enhanced Scene context on the Assembly (see Applying a Enhanced Scene Context to an Assembly) |
| Apply Assembly on Scene | applies the attributes of the Assembly context on the New Scene (see Applying an Assembly Context to a Enhanced Scene) |
In Assembly context, the available commands are:
- Definition
- Apply Scene on Assembly
- Apply Assembly on Scene
In Enhanced Scene context, when right-clicking an inactive Enhanced Scene, the available command is:
- Definition
In Enhanced Scene context, when right-clicking the active Enhanced Scene, the available commands are:
- Definition
- Apply Scene on Assembly
- Apply Assembly on Scene
- Check Position
- Save Viewpoint
- Exit Scene
![]()