 |
-
Click
 Virtual stacking management and select the
Grid
node:
Virtual stacking management and select the
Grid
node:
- A Grid Virtual Stacking node is created in the
specification tree,
- The Virtual stacking management dialog box
and the tools palettes are
displayed:
|
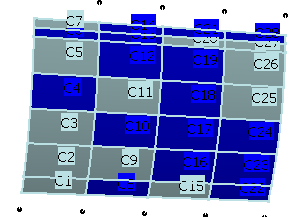
-
Set Entity level to Ply and View mode to
Cells.

-
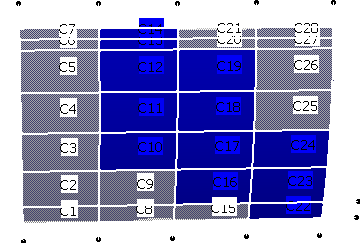
Select the row of Ply.5
in the 2D viewer.
The corresponding cells are highlighted in the 3D viewer.
-
Click Single row edition (geometry and properties)
 in the tools palette.
The Single row edition (geometry and
properties) dialog box is displayed:
Note that Sequence name is not available when Entity level is
set to Ply.
-
Pick cells C20, C21, C6, C4, C11 and C8
in the 3D Viewer and click
Cell dispatch in the dialog box:
- In the 3D viewer, those cells are displayed with a sign
indicating that they could be either removed (-) from
or added (+) to Ply.5.
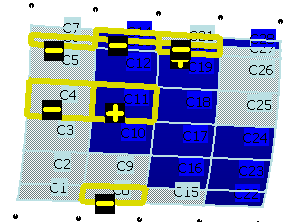
- In the dialog box,

- Sources displays the plies the cells you have
picked belong to,
- Recipients displays the plies you could send
those cells to.
In the following two steps, you will check the plies in the
Recipients and in the Sources lists:
- ?+ indicates cells that can be added to a ply,
- ?- indicates cells that can be removed from a ply,
- the green mark indicates that you have validated the proposal,
either addition or removal,
- the red cross indicates that the cells can not be moved.
|
-
Select Ply.8 in the Recipients
list. The display in the 3D Viewer changes to:
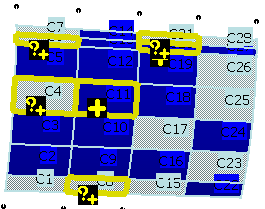
?+ indicates the cells that could be added to Ply.8.
Pick the ?+ on C6 and C4. ?+
is replaced by a green validation mark and the name of the ply the cells
belong now to.
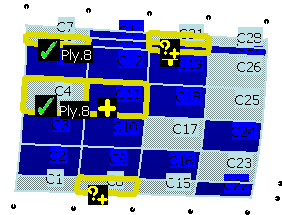
-
Select Ply.14 in the Recipients list. The
display in the 3D Viewer changes to:

The red cross identifies cells that cannot be added to the ply.
Continue to check all plies in the Recipients list.
For Ply.49, validate C20 and C21:

-
Now check the plies in the Sources list. For
Ply.54 validate the removal of C11.
-
Click OK to validate and exit the Edit
row dialog box. Select the row of Ply.5 again. It now
looks like this:
Note that the modification of the orientation of a ply or
a sequence is taken into account by the symmetry.
|