|
|
This task shows you how to merge plies, created in the same
CATPart (not in collaborative work) using any approach
(manual, solid or grid).
To be candidate to a merge, two plies must have the same
material and the same orientation.
The ply to be merged will be moved from its original group of plies to
that of the reference plies, in the sequence of its counterpart.
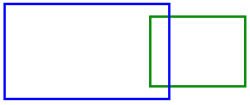
To be geometrically merged, two plies must have:
- either a common edge,
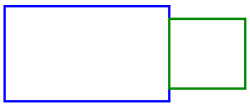
- or be overlapping.
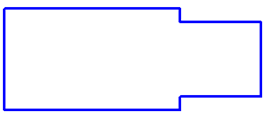
- In addition to being moved to the group of the Reference
plies, the ply to be merged will have its contour merged with that of
its counterpart. The result of the contour merge will look like this:
By default, you are in Ply mode, meaning you will merge
plies.
You can switch to Sequence mode, meaning you will merge
sequences:
- You will deal with couples of sequences,
- Whenever possible, plies will be merged within the final sequence in
one shot, whereas several merges would be necessary in Ply
mode.
|
 |
-
Click Merge Plies
 .
The Merge plies dialog box is displayed: .
The Merge plies dialog box is displayed:

By default, you are in Ply mode.
This dialog box can be resized for a better display of the information.
-
Select Plies Group.1. The plies it
contains will be the Reference plies.
For the moment, Plies Group.1 looks like this:

-
Click No selection in the Plies
to be merged frame and select Plies Group.2.
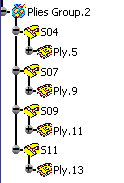
For the moment, Plies Group.2 looks like this:

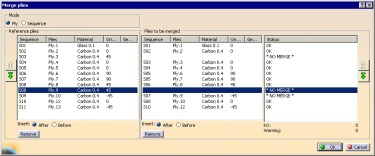
The dialog box is updated with information about the Reference
plies, the Plies to be merged and the status of
possible merges. Resize the dialog box as required:

Check the status of each couple of plies.
When you select a line in
the dialog box, the plies are highlighted in the 3D Viewer to help you
make a decision (Reference plies have a solid highlight, Plies to be merged
have a highlight with dots, both in the color of their orientation).
The status of the first two couples is
OK. They can be merged.
The status of the third couple is
KO because the orientations are
different.
- Select the line and click
 . .
- Ply.3 and all the plies below Ply.3 go one rank
downward.

- The status has changed to KO: missing ply.
- Use the contextual menu

to change this status to
No Merge:

|
-
The couple Ply.6/Ply.5 cannot be merged.

Click
Remove in the Plies to be merged column to remove
Ply.5.

-
Process the couple of Ply.9 as you did for the
couple of Ply.3 (one rank downwards, NO MERGE)

-
For the couple Ply.11/Ply.10, click Remove in the
Reference plies column to remove Ply.11.

-
For the couple Ply.13/Ply.11, click Remove
in the Plies to be merged column to remove Ply.11

-
Finally click Remove in the Plies
to be merged column to remove Ply.13.
-
Click OK. The merges are performed.
A message is displayed warning you that some couples of plies cannot be
geometrically merged.
Click OK to continue:
- The plies that have been removed from the list of Plies to be merged have remained untouched
(Ply.5,
Ply.11 and Ply.13in Plies Group.2).
- All the other Plies to be merged have been
moved from Plies Group.2 to Plies Group.1,
in the sequence of their counterpart from the Reference
plies..
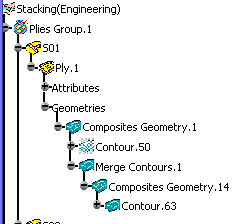
- Whenever possible, the geometries of the plies to be
merged have been merged and a new contour has been created:
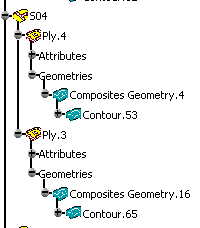
- Otherwise, the ply to be merged has been moved to the
sequence of the reference ply:
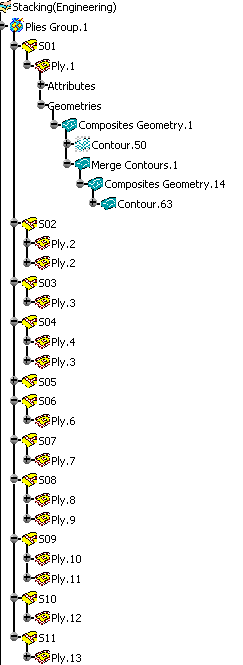
- Plies Group.1 now looks like this:
Note:
- When a ply to merge has no associated reference ply, and when
this ply belongs to a sequence with at least one ply that will be
correctly merged, a message is displayed, asking for your
confirmation. If you click OK, the ply with no
associated one will follow the merged ply in the same sequence.
- When:
- a ply to merge has no associated reference ply, but does
comply with the case above,
- this ply belongs to a sequence whose plies are all to be
merged,
- a couple of plies that can be merged correctly exist right
before this ply in the stacking order,
a message is displayed, asking for your confirmation. If you
click OK, the complete sequence containing this ply
with no associated ply will be moved right behind the sequence
containing the above-mentioned mergeable couple of plies.
|
|