-
Click ZLevel Map
 .
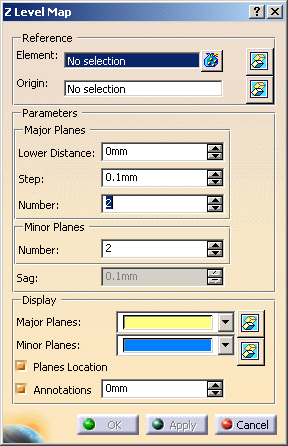
The ZLevel Map dialog box is displayed:
.
The ZLevel Map dialog box is displayed:
-
Select Mesh.2 as the Reference Element.
Multi-selection is available.
You can select several meshes, or surfaces and meshes or a geometrical set.
 is available to hide or show the selection.
 -
Place the cursor on the Origin field and use the contextual menu to create the Origin point.
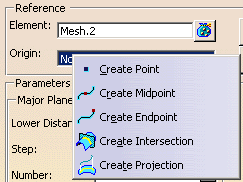
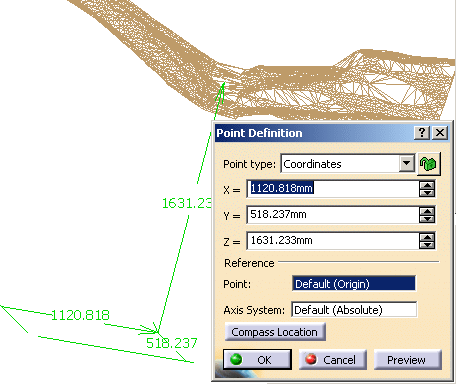
The map plane is automatically defined by this point and the Z-Axis.
You can also select an existing point. -
Define the parameters for the major planes:

- Key in the Lower Distance, i.e. the distance on the Z-Axis between the first (lower) plane and the origin point. By default, this lower distance is automatically computed to the lower limit of the input elements (first plane with intersection with the input elements).
- Key in the Step between two major planes.
- Key in the Number of major planes requested. By default, this number is automatically computed to the upper limit of the input elements (first plane without intersection with the input elements)
-
Key in the Number of minor planes you need between two major planes.
-
If you have selected surfaces or volumes, you can define the Sag (chordal error) used to mesh them.
-
Define the Display options for the major and minor planes.
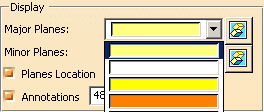 is available to hide or show the selection.
By default, Planes Location is selected and the planes that define the ZLevel are displayed.
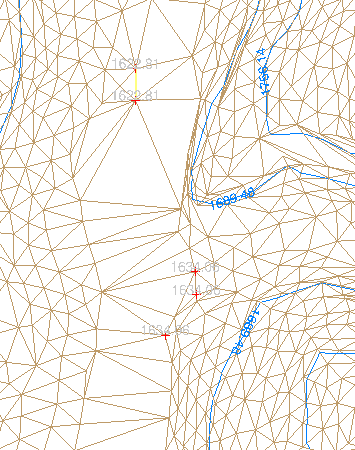
By default, Annotations is selected and level annotations are displayed. They are positioned automatically along major scans. If a scan is long, the level annotation is repeated along the scan. The distance between two annotations is computed automatically but is editable.
If you change this value, keep the distance long enough to avoid an overlap of the annotations. -
Click Apply.
The ZLevels are computed and displayed:
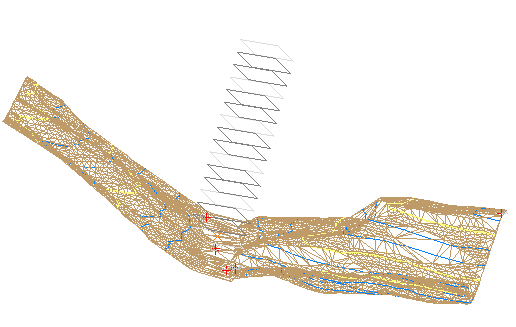
with the mesh hidden:
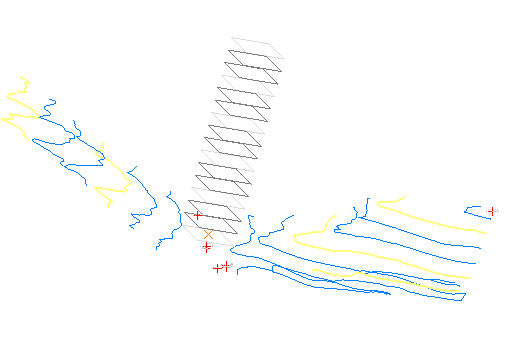
Closer look:
-
Click OK to validate and exit the dialog box.
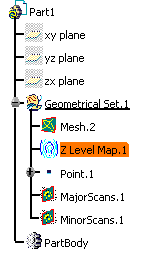
A ZLevel Map feature is created in the specification tree.
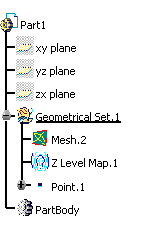
You can:- double-click it to edit it, e.g. to replace the input mesh by another one.
- right-click it to display its
contextual menu:
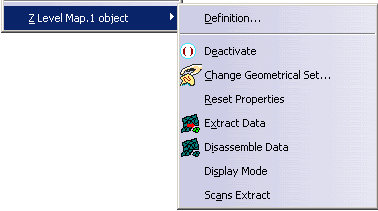
- Definition reopens the ZLevel Map dialog box (equivalent to double-click),
- Display Mode opens the ZLevel Map Display Mode
dialog box
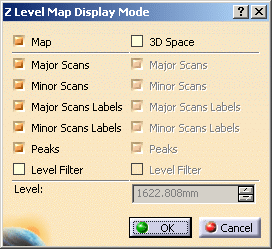
By default, Map is selected, i.e. all major and minor scans are displayed.
Major Scans displays only the major scans,
Minor Scans displays only the minor scans,
Level Filter displays only the scan of a given Level. It requires that you enter this level in the field below. - Scans
Extract creates automatically two sets of scans: One for
the major scans, one for the minor scans.
![]()