-
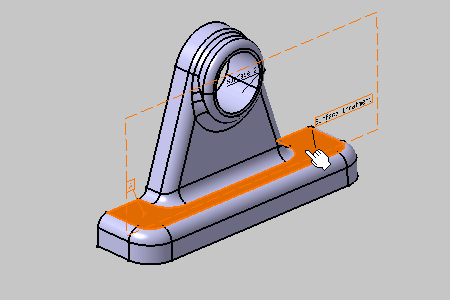
Select the face as shown.
-
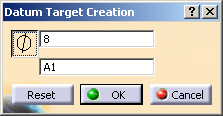
In the dialog box that appears, click the diameter icon.


The Tools Palette is displayed according to the type of face selected depending on the canonicity. In this scenario the Tools Palette is not used. For more information, refer to Propagating Geometry Selection for Feature Creation.
-
Enter 8 in the field opposite and enter "A1" in the field to the left.
-
Click OK to validate.
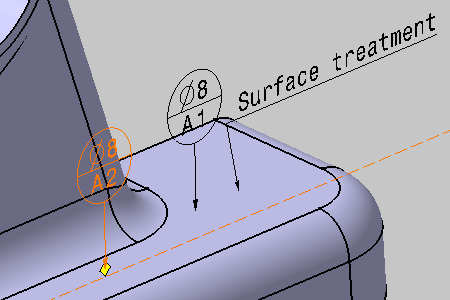
You have created a datum target on datum plane A.
The datum target corresponds to a 8mm-diameter surface.
The name of the target is "A1".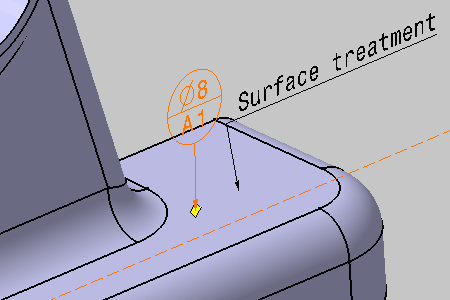
-
Repeat the previous steps to specify two additional datum targets: A2 and A3.