-
Click New View
 in Layout toolbar.
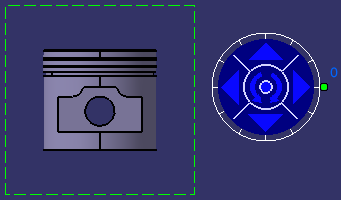
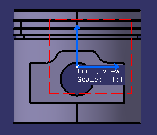
The preview of the 2D view frame along with the blue knob manipulator is displayed in the sheet. Depending on a possible selection, the manipulator allows you to either change the primary view type (no selection), or to change the view box orientation. If a reference element is selected, the view box size is computed based on the 3D model size, such that the view box contains the entire 3D model.
In the product context, the view box size is computed on the basis of the size of the active CATPart (the assembly context is never taken into account).
Note that you can redefine the projection plane using the blue arrows at any time before the view creation: to the bottom, the left, the right, the top, or rotated using the given snapping or according to an edited rotation angle. For more information, refer to Defining the view orientation during view creation.
You can change the view position by dragging the dotted green frame or press Crtl key and move the cursor to the desired location.
When no reference plane or surface is selected from 3D, then the view box dimensions are computed from the standards (Tools > Standard > Drafting > Standard_Name > Layout Views Customization). For more information, refer to Layout Views Customization.
-
Click on the sheet to position the new view.

Note how the view is previewed in the part window. You need to zoom out, as the view box defined in the ISO_3D standard used by the current layout has sides of 1000mm. For more information on the standards, see Administration Tasks.
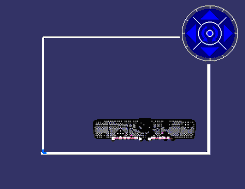
An empty primary view is created, displaying a blue axis in a red frame, as well as the view name and scale. Additionally, the Front view item is added to the specification tree.

In our scenario, the primary view is a front view. The view type for the primary view is defined in the current standard (ISO_3D in our scenario). 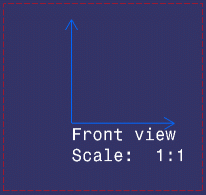
You can now create 2D geometry in your view or continue creating more projection views as detailed below.
-
Click New View
again and click in the layout at the location where you want the
projection view to be positioned: you can create Left, Right, Top, Bottom
and Isometric views. Create a Left view, for example.- Projection views are always created from the active (current) view.
- Positioning the view defines the projection view direction, in
accordance with the projection method and the primary view type (a
front view in our scenario).
The projection method (First angle standard or Third angle standard) is defined by the sheet style, as specified in the standard used by the layout. For more information, refer to Sheet Styles in the Administration Tasks chapter. You can change the projection method by editing the layout sheet properties (through Edit > Properties). - Remember that it is not possible to create several projection views of a same type within a set of views (two Right views, for example).
- Primary views are created using the sheet scale.
- Projection views are always created using the scale of the current view.
- If you change the sheet scale (defined in the sheet properties), the scale of all existing views (defined in the view properties) is multiplied by that of the sheet (for example, if existing views already have a scale of 1/10, and if you change the sheet scale to 1/10, then existing views will now have a scale of 1/100).
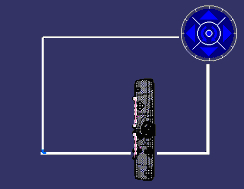
The view is created. The specification tree is updated again to show the newly created view.
-
Double-click the New View icon to create several projection views one after the other: this time, create Right, Top, Bottom and Isometric views. The specification tree is updated again.
-
Press Escape when you have created your views.
-
Activate one of the projection views by double-clicking it. For example, activate the Left view.
-
Click New View
again: this time, you can create Rear or Isometric views from the left
view. Create a rear view, for example. The specification tree is updated
again.
Defining the view orientation during view creation
-
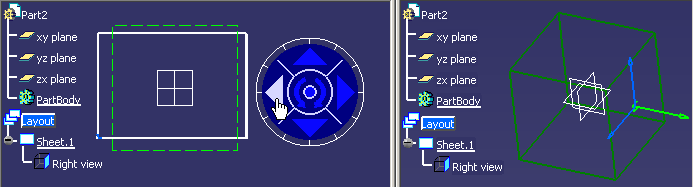
Click the right or left arrow to visualize the left or right side, respectively.
-
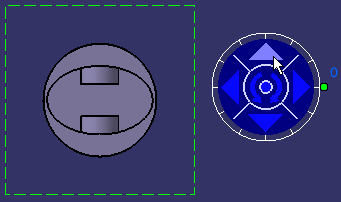
Click the top arrow to visualize the bottom side.
-
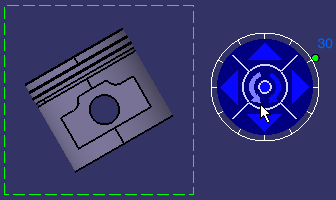
Click the counterclockwise arrow to rotate the reference plane.
-
Drag the green knob to redefine the rotating angle. The default increment value is 30 degrees.
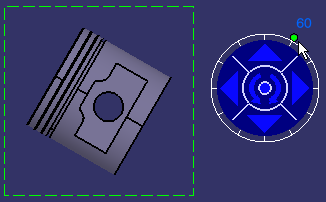
The green knob for angular modification is displayed only when a 3D reference element is selected for view creation. -
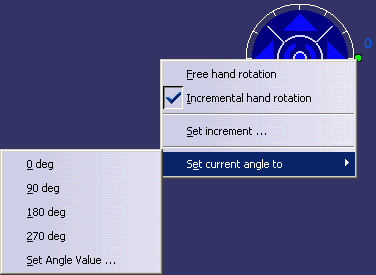
You can modify the increment value using the contextual menu, which is available for the green knob. To do this, right-click the green knob and select the desired option:
-
Free hand rotation: Lets you rotate the knob in a free manner using the mouse, instead of snapping it to a given increment.
-
Incremental hand rotation: Snaps the rotation to a given increment (from 0 to 30 degrees, between zero and 330). This is the default value.
-
Set increment...: Displays the Increment Setting dialog box. Enter the required value in the Increment value (deg) field. For example, type 5 (for 5 degrees) and click OK.
-
Set current angle to:
-
0 deg: Sets the current angle value to 0 degree.
-
90 deg: Sets the current angle value to 90 degrees.
-
180 deg: Sets the current angle value to 180 degrees.
-
270 deg: Sets the current angle value to 270 degrees.
-
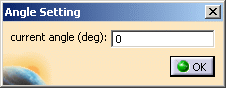
Set angle value...: Displays the Angle Setting dialog box. Enter the required value in the current angle (deg) field.
-
-
-
Click in the center of the knob to fix the position of the view.
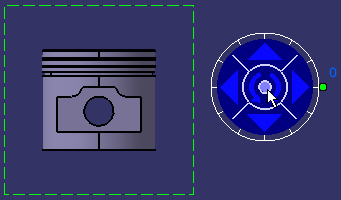
- The view
is created.
-
The 2D position of the newly created primary view is computed such that the projection of the 3D model center coincides with the center of the 2D window.
-
All non-zoomable elements (i.e. planes, infinite lines) and 3D annotations are not considered during the computation of the view box. If the model contains only non-zoomable elements and/or 3D annotations, then all these elements are taken into account to avoid having a null size bounding sphere.
-
After the primary view is created, you can modify its position on the sheet. Further if you use the 3D manipulator to rotate the view, then the 2D view position is stabilized such that the 3D model center is still projected to the same 2D position.


-
The creation of isometric views cannot be customized using the blue knob manipulator.
-
It is not possible to edit the view box from an existing primary view.
-
When you select a reference plane to define a primary view, the view lies on a plane parallel to the selection.
-
The 3D axis origin is equal to the bounding sphere centre or to the bottom left corner of the view box containing the bounding sphere.
-
The box overall dimensions are computed to hold the bounding sphere.
- The reference elements that can be selected for view
creation are:
Reference objects that can be selected 3D Plane* Sketch Face FTA view Inverse and Rotate of plane Axis system** * The direction of the primary view created from 3D planes is along the normal of the 3D plane.
** The XY plane of the axis system is considered as support in case of selection of a right-handed or left-handed axis system. The Z-axis gives the view box its orientation for a right-handed axis system, otherwise the orientation is the opposite of the Z-axis i.e. the direction of the primary view created will be along Z-axis.
The center of the view box coincides with the axis system origin, whatever the 3D axis position may be. -
The direction of primary views created from 3D selection (except the 3D planes and axis system) depends on the selection plane and the bounding sphere center. From the selection plane, the new primary view is created on the closest side from the selection. In this case you can see that the blue plane is created on the other side, which is closer.
The direction of primary view created from 3D planes is along normal of the 3D plane. In case of axis system the direction of primary view created is along the Z-axis of the axis systems.
-
If no selection is performed while creating a primary view, then the view type and its orientation on the view box is changed when the arrows of the blue knob are used.
In this case you can see that as the arrows are clicked the view type and orientation is changing.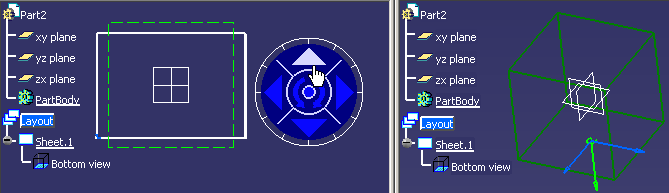
![]()