") |
-
Open the
PktCreatePowerCopy.CATPart document.
-
From the Start>Knowledgeware menu, access the
Product Knowledge Template workbench.
-
Click the Create a PowerCopy icon ( ).
The Power Copy Definition dialog box is displayed. ).
The Power Copy Definition dialog box is displayed.
-
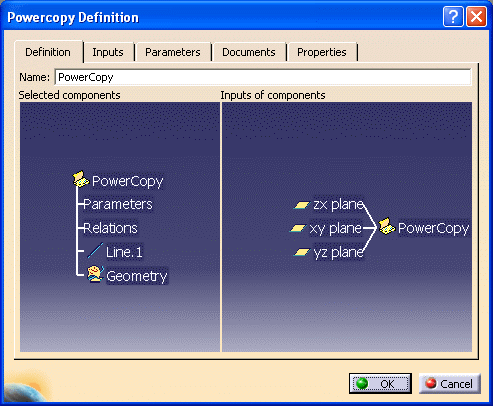
Select the elements making up the Power Copy from the
specification tree. For the purposes of our scenario, select the
following items:
|
|
|
|
|
|
|
|
 |
The components of a Power Copy must be
consecutive elements if they are located in an ordered set like an
Ordered Geometrical Set. To know more, see
Frequently Asked Questions: PowerCopies. |
|
|
If a Power Copy embeds a relation
(i.e. rules, checks or formulas) that references one of the
inputs of the Power Copy, the selection of a geometrical
Sub-element for this input will not be possible at instantiation
time. |
The dialog box is automatically filled with information about the
selected elements.
-
Define the Power Copy as you want to create it:
|
|
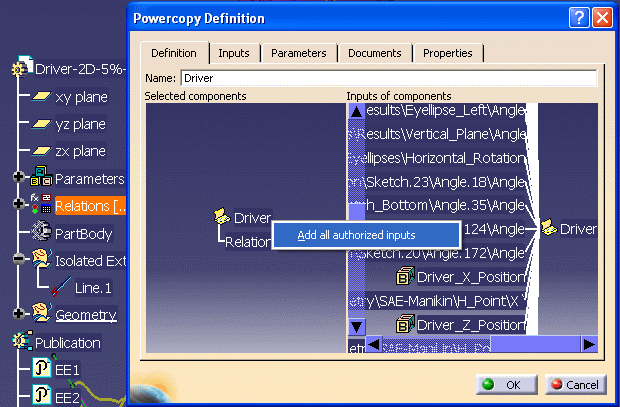
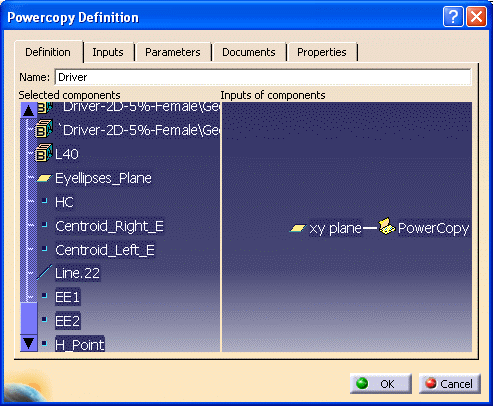
The Definition tab lets you assign a
name to the Power Copy and presents its components in the 3D
viewer. For example, enter "Driver" in the Name: field.
This
tab also allows you to
use the contextual Add all authorized inputs command
in order to automatically add all authorized inputs allowed to
be selected as components. This command is available either on a
geometrical component or on the template reference node itself.
In order
to illustrate the Add all authorized inputs
command,
follow the steps described here bellow:
-
Select
the Relations item.
-
Right-click the Power Copy icon () and select the Add all
authorized inputs command.
-
The Selected components section
automatically displays all the allowed features for the
given component as shown below.
|
|
|
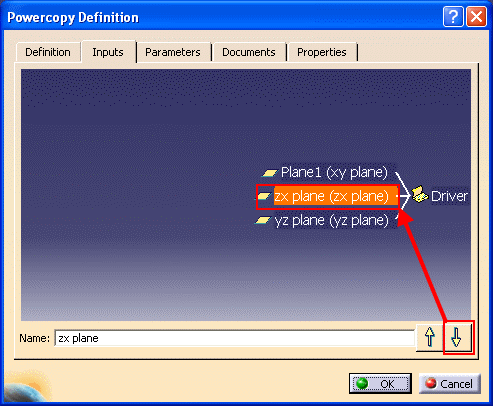
The Inputs tab shows you the inputs
(elements to select at instantiation) of the Power Copy. You can
rename these elements for a clearer definition by selecting them in
the viewer and entering a new name in the Name: field.
In parentheses you still can read the elements' default name based
on its type. For example, select xy plane and rename it as
"Plane1".
This tab
also allows you to reorder the list of inputs of a template
reference at creation time. Note that the
customized order will be reused at instantiation time. For example, select zx plane and
move it down by clicking on the
 icon.
icon.
 |
|
|
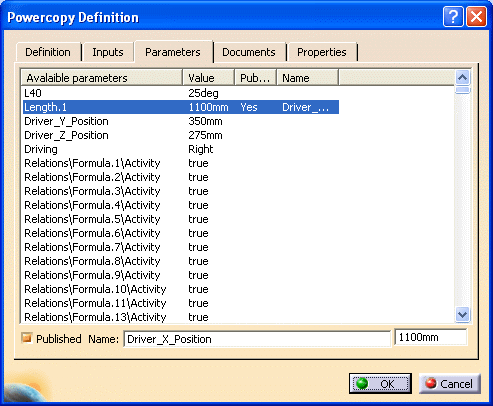
The Parameters tab lets you define which
of the parameter values used in the Power Copy you will be able to
modify at instantiation time. This can be a value, or a formula for
example.
Select the parameters and check Published.
For a formula, you can set it to false or true.
For example, select Driver_X_Position.
Use the Name field to give another name
to this element. For example, enter X_Position and publish it.
 |
|
|
The Documents tab shows the complete
path and role of Design tables referenced by an element included in
the Power Copy. |
|
|
The Properties tab lets you modify the
icon identifying the Power Copy in the specifications tree. A
subset of icons is available from Icon choice. If you
click ... the Icon Browser opens, showing all icons
loaded on your CATIA session. Click the envelope icon .
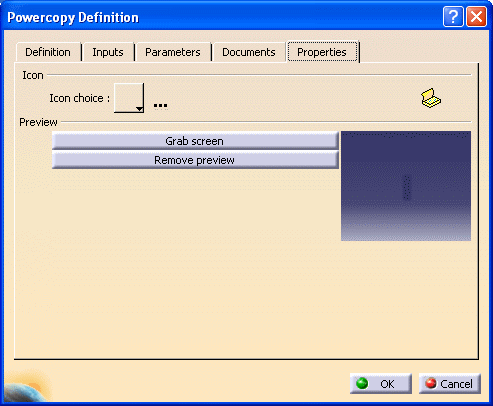
Grab screen lets you capture an image of
the screen. If you want to display the Power Copy component,
display them and click Grab
screen. You can zoom in or out the image to adjust it. Click
Remove preview if you do not need this image. |
-
Click OK to create the Power Copy. Save your
file. Click here to
open the created file.
|