|
|
This task shows how to insert a
Trochoid Milling operation in the program.
To create the operation you must define:
|
|
|
|
Open your CATPart document, then select
the desired Machining workbench from the Start
menu. Make the Manufacturing Program current in the specification
tree. |
|
|
|
1. |
Select Trochoid Milling
The Trochoid Milling dialog box appears directly at the
Geometry tab page
|
|
|
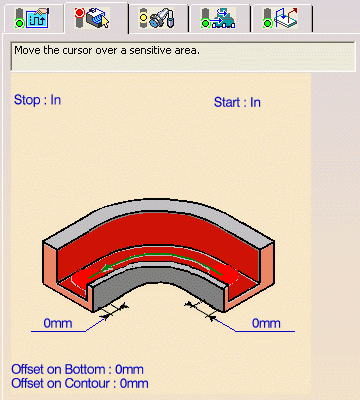
The part bottom and flank in the icon are colored red indicating that this geometry is required for defining the operation. All other geometry is optional. | |
| 2. | Click red bottom in the icon, then select the desired bottom element in the 3D window. | |
| 3. | Click red flank in the icon, then select the desired guiding element in the 3D window. | |
| 4. | Right-click Start to set this condition
to Out.
Click corresponding relimiting element in the icon, then select the desired start element in the 3D window. |
|
| 5. | Right-click Stop to set this condition
to Out.
Click corresponding relimiting element in the icon, then select the desired stop element in the 3D window. |
|
|
|
The bottom, guide and limit elements of the icon are now colored green indicating that this geometry is now defined. These are also indicated on the part. | |
| 6. | Select the Strategy
tab page
You can then use the tabs to set parameters for:
|
|
| 7. | An end-mill tool is proposed by default when you want
to create a machining operation. If the proposed tool is not suitable,
just select the Tool tab page
This is described in Edit the Tool of an Operation. |
|
| 8. | Select the Feeds and Speeds
tab page
|
|
| 9. |
If needed, add approach and retract macros to the operation in the
Macros tab page
For more information please refer to Define Macros of a Milling Operation. |
|
| 10. | Check the validity of the operation by replaying the tool path. | |
| 11. | Click OK to create the operation. | |
|
|
||