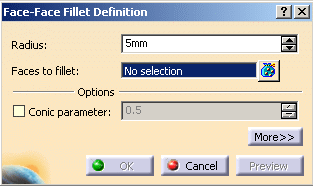
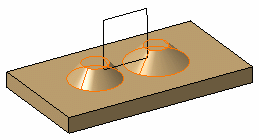
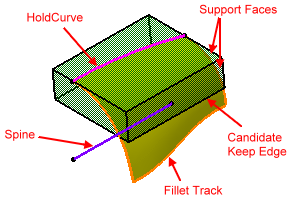
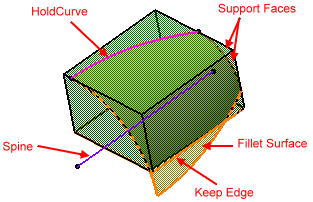
The Face-Face Fillet command is used when there is no intersection between the faces or when there are more than two sharp edges between the faces.
This task shows how to create a basic face-face fillet then a face-face fillet using a hold curve.
-
Click Preview to see the fillet to be created.
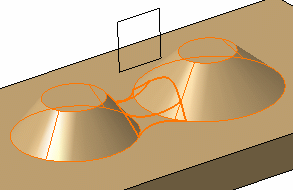
Limiting Element
-
Click the Limiting element field and select Plane.1 as the trimming plane.
An arrow appears on the plane to indicate the portion of material that will be kept.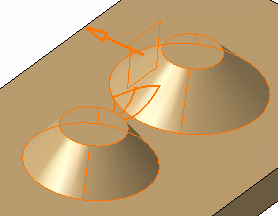
-
Click this arrow to reverse direction to keep the material of the opposite portion.
Contextual commands creating the limiting elements you need are now available from the Limiting element field:
-
Create Plane: For more information, see Creating Planes
-
XY Plane: The XY plane of the current coordinate system origin (0,0,0) becomes the limiting element.
-
YZ Plane: The YZ plane of the current coordinate system origin (0,0,0) becomes the limiting element.
-
ZX Plane: The ZX plane of the current coordinate system origin (0,0,0) becomes the limiting element.
-
Create Join: Joins surfaces or curves. See Joining Surfaces or Curves.
-
Create Extrapol: Extrapolates surface boundaries or curves. For mor information, see Extrapolating Surfaces and Extrapolating Curves.
If you create any of these elements, the application displays the corresponding icon next to the Limiting element field. Clicking this icon enables you to edit the element.
![]()
-
Click OK.
The faces are filleted. The fillet is trimmed by Plane.1. This creation is indicated in the specification tree.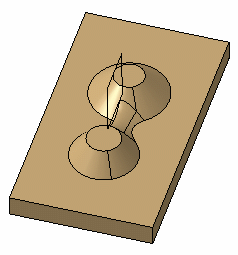
Select the
Conic
parameter
check box to vary the section of the fillet.
For a parameter between or equal to:
-
0.5, the resulting curve is a parabola.
-
0 < parameter < 0.5, the resulting curve is an arc of an ellipse.
-
0.5 < parameter < 1, the resulting curve is a hyperbola.
-
If the Conic parameter option is selected, the Edge(s) to keep, Hold curve and Spine fields cannot be selected.
-
Conical fillets do not handle twist configurations. If a twist is detected, the fillet operation fails.
-
If the fillet surface curvature is lower than the support curvature, fillet surface relimitation may fail. In this case decrease the Conic parameter.
-
The Edge(s) to keep and Hold Curve options are grayed out, when the CFO license is not available.
Interrupting Fillet Computations
In case you made a mistake when defining a fillet (wrong radius value
for example), you can interrupt the feature computation launched after
clicking OK, provided that the computation requires at least 5
seconds to perform.
When a computation exceeds 5 seconds, a progress bar appears and provides a
Cancel option. To interrupt the operation, just click that
Cancel button. This interrupts the process and then displays an
Update Diagnosis dialog box enabling you to edit, deactivate, isolate or
even delete the feature.
This capability is available for any types of fillet features you are creating or editing.
Hold Curve
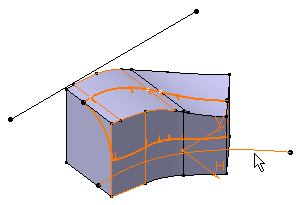
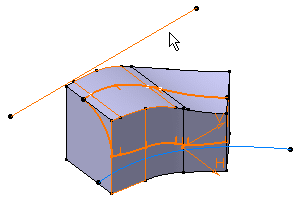
Instead of entering a radius value, you can use a hold curve to compute the fillet. Depending on the curve's shape, the fillet's radius value is then more or less variable.
Open the FaceFillet2.CATPart document.
Set Body.1 as the current object (to do so, use the Define In Work Object command).
The Generative Shape Design product license is required to access this capability.
-
Contextual commands creating the curves you need are available from the Hold Curve field:
-
Create Line: For more information, see Creating Lines.
-
Create Join: Joins surfaces or curves. For more information, see Joining Surfaces or Curves.
-
Create Boundary: For more information, see Creating Boundary Curves.
-
Create Extract: For more information, see Extracting Geometry.
-
Create Intersection: For more information, see Creating Intersections.
-
Create Projection: For more information, see Creating Projections.
If you create any of these elements, the application then displays the corresponding icon in front of the Hold Curve field. Clicking this icon enables you to edit the element.
-
-
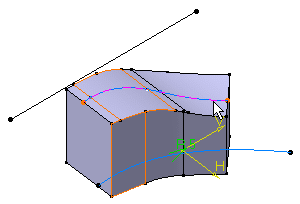
Click Face-Face Fillet
 . Select both faces as shown then expand the dialog
box to access further options.
-
Select Join.2 as the hold curve. The curve must be sketched on one of the selected faces.

Spine
Contextual commands creating the spines you need are available from the Spine field:
-
Create Line: For more information, see Creating Lines
-
Create Join: Joins surfaces or curves. For more information, see Joining Surfaces or Curves.
-
Create Boundary: For more information, see Creating Boundary Curves.
-
Create Extract: For more information, see Extracting Geometry.
-
X Axis: The X axis of the current coordinate system origin (0,0,0) becomes the direction.
-
Y Axis: The Y axis of the current coordinate system origin (0,0,0) becomes the direction.
-
Z Axis: The Z axis of the current coordinate system origin (0,0,0) becomes the direction.
If you create any of these elements, the application then displays the corresponding icon in front of the Spine field. Clicking this icon enables you to edit the element.
Maximum length of the fillet surface is limited by the extents of the input spine curve.
