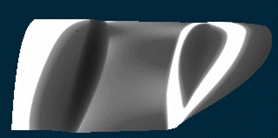
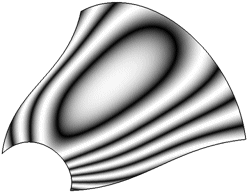
This task shows how to perform an analysis of the surfaces quality of shaded highlights.
These lines connect the surface points where the angle of incidence of the light is constant, they are called 'Isophotes'.
The brightest reflection occurs at an angle of incidence = 90°.
For the computation of the isophotes all points will be determined in which the surface normal has the same direction.
The angle between light direction and surface normal is constant.
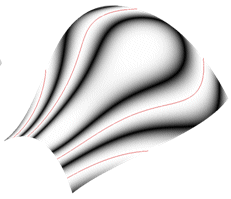
The course of highlight lines illustrates – like reflection lines – the shape of the surface and the quality of
surface matchings.
In contrast to the reflection diagnosis, the highlight diagnosis does not depend on the view direction.

-
Click the Highlight Analysis icon
 .
.The 'Highlight Analysis' dialog box is displayed.

 Select Geometrical Set: Select a geometrical
set in the specification tree. If you select an element, all elements in the same geometrical set are also selected.
Select Geometrical Set: Select a geometrical
set in the specification tree. If you select an element, all elements in the same geometrical set are also selected.- Element: Selection of the elements used for the calculation of the Highlight analysis.
- Type:
- Color: There are three different color types of displaying Highlights:
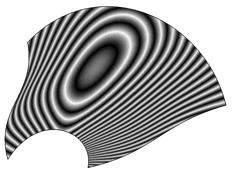
 Highlight:
The width of the brightness flow depends on the Shine. The brightness is amplified exponentially
with increasing shine factor.
Highlight:
The width of the brightness flow depends on the Shine. The brightness is amplified exponentially
with increasing shine factor.

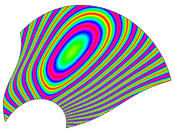
 Colored: The Highlight lines are displayed
in different colors.
Colored: The Highlight lines are displayed
in different colors.
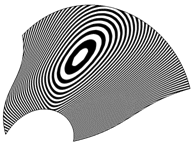
 Black and White: The Highlight lines are
displayed in black and white. The width of the Highlight lines is constant. A shine factor cannot be defined.
Black and White: The Highlight lines are
displayed in black and white. The width of the Highlight lines is constant. A shine factor cannot be defined.
- Projection: For the calculation of the Highlight lines, two projection modes can be used:
 Beam: The Highlight lines are calculated
directly from the light beam of the parallel light source.
Beam: The Highlight lines are calculated
directly from the light beam of the parallel light source.
The direction of the light beam can be modified using the manipulator.
 Cylinder: The Highlight lines are created
by reflection of stripes on the interior side of an imaginary cylinder around the geometry.
Cylinder: The Highlight lines are created
by reflection of stripes on the interior side of an imaginary cylinder around the geometry.
The cylinder axis can be modified using the compass tool.

- Color: There are three different color types of displaying Highlights:
- Options:
 Anti-Aliasing: The edges of the Highlight lines
can be smoothed by an anti-alias.
Anti-Aliasing: The edges of the Highlight lines
can be smoothed by an anti-alias.
Anti-Aliasing OFF

Anti-Aliasing ON

- Attached: The light source is fixed either to the View or to the Model.
- Tessellation: Defines the accuracy for the triangle calculation to improve the quality of the highlight lines.
With the check button, you can switch on and off the display of the individual tessellation.
Highlights with approx. 650 Triangles
Highlights with approx. 51000 Triangles
- Color :
- Shaded: Selection of the color button activates the standard Catia Color Chooser to choose another color
for the Highlight.
This option by default is switched on with the color set to White.

- Curves: Selection of the color button activates the standard Catia Color Chooser to choose another color
for the Highlight lines.
This option by default is switched off with the color set to Red.
Curves OFF Curves ON 
- Cycles: If the type Highlight is active, you can set the number of highlights to
be displayed.
Number of cycles set to 10 Number of cycles set to 70 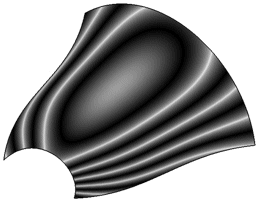

- Shine: If the type Highlight is active, you can set the highlight
width.
Shine value set to 10 Shine value set to 70 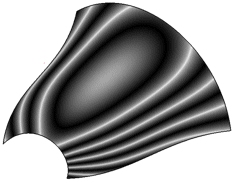
- Shaded: Selection of the color button activates the standard Catia Color Chooser to choose another color
for the Highlight.
- Symmetry plane: For the selected geometry can be selected a symmetry plane at which the geometry is mirrored.
- Direction: see Creating Split Curves