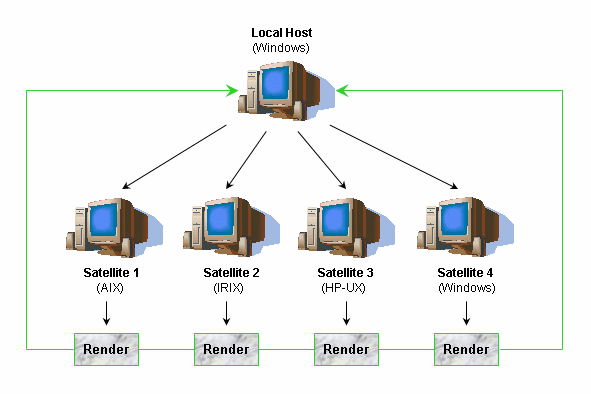
Distributed rendering enables to decrease rendering time since several processors are used to generate the image.
This capability is especially useful when rendering huge models.

- AIX
- IRIX
- HP-UX
- Solaris
- Windows.
|
Prior to distributing rendering to satellites, you must first install these satellites. Refer to Installing and Uninstalling Satellites on Windows or Installing and Uninstalling Satellites on UNIX, depending on your operating system. You can use up to 24 CPUs simultaneously (including those of the local host). |
mi-ray
     7001/tcp # Rendering slave
Note: You can specify a port number other than "7001", if necessary. The port number is arbitrary but must be the same for all the satellites and the local host so that they can communicate.
-
Open your model document.
-
Select Tools > Options > Infrastructure > Photo Studio.
-
Access the Satellites tab.
Note: This tab is available only when using Photo Studio Optimizer. -
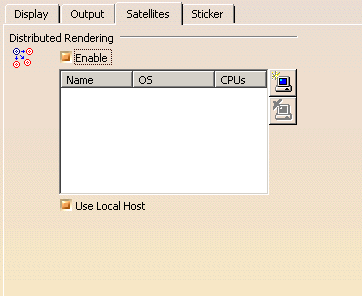
Select the Enable check box to activate distributed rendering. The other options are activated:

-
Click the Add Satellite
 button to open the
following dialog box:
-
In the Name box, enter the name of the first satellite to be used.
-
Click OK to validate then repeat steps 4 and 5 as many times as necessary to add other satellites.
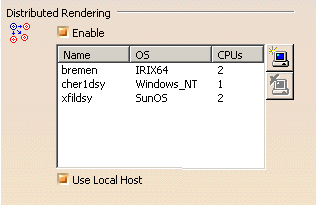
The application checks the connection then retrieves information on the satellite (name, operating system, CPU) in the corresponding columns in the Satellites tab: 
If a problem occurs while checking the connection, an error message is displayed. 
To remove a satellite from the list, select it then click the Remove Satellite  button.
 -
Clear Use Local Host if you do not want to use the CPUs of the local host.
Clearing this option lets you reduce CPU usage on the local computer and you can then use this computer to perform other operations (except those requiring the use of a Version 5 session).
However, bear in mind that whether the Use Local Host check box is selected or not, the local host's CPUs is always used for pre-processing.
-
Click OK to validate and close the dialog box.
Now that the satellites have been correctly installed and defined, it is time to generate your rendered image. -
Click Create Shooting
 to define your rendering parameters then generate the rendered image.
 Refer to the Shooting section for detailed information.
To deactivate distributed rendering, simply re-access the Satellites tab then clear the Enable check box.