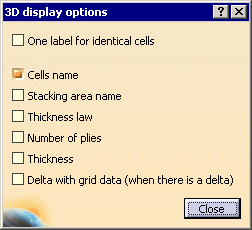
|
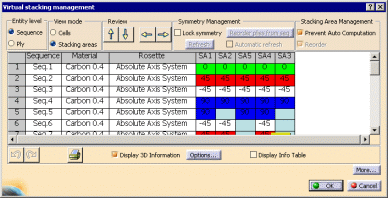
Provides tools to manage the virtual stacking.

When you click a command in the Tools Palette:
- its icon turns orange, the other icons turn grey.
- the Running Commands dialog box is displayed.
- click the icon again to end a command, or hit Escape,
or click Select.
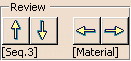
 Select:
When you start the Virtual Stacking Management, the Select
command in the Tools Palette is active. Nothing happens if
you click it.
When you start a command, Select is de-activated and
ready to be activated again.
When you click Select, the current sub-command is ended.
 Repeat applies to:
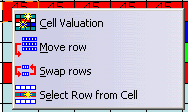
- Cell Valuation,
- Move Row,
- Swap Rows,
- Duplicate Row,
- Cut Row,
- Paste Row
Click Repeat. The unavailable commands are greyed.
Start a command. The other commands are greyed. The current command is
marked Repeated in the Running Commands
dialog box.
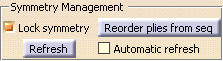
 Merge domains:
merges sequences or plies:
Merge domains:
merges sequences or plies:
(This command is not available if
Lock symmetry is
selected.)
 Create a new stacking
area:
Create a new stacking
area:
This command is not impacted by Lock symmetry.
 Check ply rules:
This command is not impacted by
Lock symmetry.
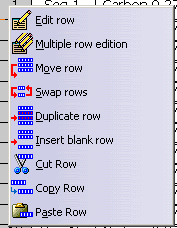
 Single row edition (geometry and properties): See
Editing
a Row.
Single row edition (geometry and properties): See
Editing
a Row.
All attributes can be modified.
Lock symmetry
is taken into account, except for Cell dispatch.
Orientation, material and cell coverage will be transferred to
lower symmetric layers.
Cell dispatch works for non-symmetric layers or for the
upper symmetric layers only.
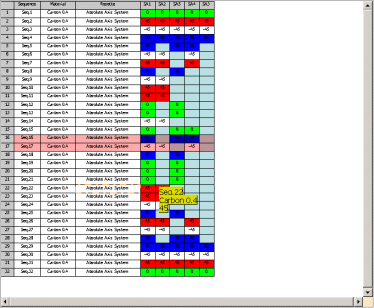
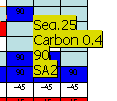
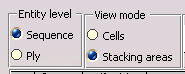
When the Entity level is set to
Ply,
Material, Direction and Rosette are not
available if you have selected and intend to modify only some of the
plies belonging to a sequence: modifying those properties for only some
plies of a sequence that contains more would lead to a sequence with
several rosettes, orientations or material.
 Multiple row edition (properties only):
This command is not available when
Lock symmetry is
selected.

All attributes can be modified.
You can change the
Material, the Direction and the
Rosette by
choosing another one from the drop-down lists. You can also rename
the sequences or the plies.
When the Entity level is set to
Ply,
Material, Direction and Rosette are not
available if you have selected and intend to modify only some of the
plies belonging to a sequence: modifying those properties for only some
plies of a sequence that contains more would lead to a sequence with
several rosettes, orientations or material.
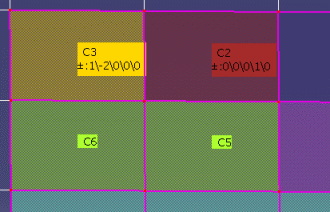
 Toggle cells: lets you enter or remove (the cell will be empty) a cell
orientation value. This orientation is that of the row on
which you have selected the cell. Multi-selection is available
using the command icon, not the contextual menu. You could also
double-click the cell.
Toggle cells: lets you enter or remove (the cell will be empty) a cell
orientation value. This orientation is that of the row on
which you have selected the cell. Multi-selection is available
using the command icon, not the contextual menu. You could also
double-click the cell.
Lock symmetry is taken into account.
 Move row:
Works for non-symmetric layers or for the upper symmetric layers
only.
Select a row in the 2D viewer, click
,
select the row where you want to paste the moved one.
 Swap rows:
Works for non-symmetric layers or for the upper symmetric layers
only.
Click
and select the two rows to swap.
 Duplicate row (sequence or ply):
Click
 ,
then a row in the 2D viewer. A row, a sequence or a ply is
inserted, with the name Copy of xxx. ,
then a row in the 2D viewer. A row, a sequence or a ply is
inserted, with the name Copy of xxx.
Lock symmetry is taken into account.
Insert blank row (sequence or ply):
Lock symmetry
is taken into account.
Click
,
then a row xx in the 2D viewer. A row, a sequence or a ply is
inserted where you picked:
- for a sequence, the name is New Seq(xx+1) .
- for a ply, the name of the ply is New(Ply(xx+1),
the name of the sequence is that of the sequence selected, the
orientation name is that of the row selected and the field is greyed.
 Cut Row,
Multi-selection is possible.
Lock symmetry is taken into account.
 Copy Row,
Lock symmetry is taken into account.
 Paste Row:
Select a row in the 2D viewer, click
or
,
select the row where you want to paste the cut or copied one,
click
.
A row, a sequence or a ply is inserted, with the name
Copy of xxx.
Lock symmetry is taken into account.
 Select Row from Cell.
Contextual Menus
Several
contextual menus
are available:
- on a cell
- on a row
These functionalities are equivalent to those of the tools
palette and are described
below.
They accept multi-selection.
|